Replacing the PCB on Your Argos
This guide walks you through removing and reinstalling the PCB on your Argos.
Please refer to this video for side panel and cover removal:
Odyssey Argos Removing Side Panels and Covers
🔧 Tools Needed
- 3 mm hex key (ball-end makes it easier, but the one stored at the bottom of the machine also works)
- 7mm wrench
- Optional: Small pliers or flathead screwdriver (for better grip)
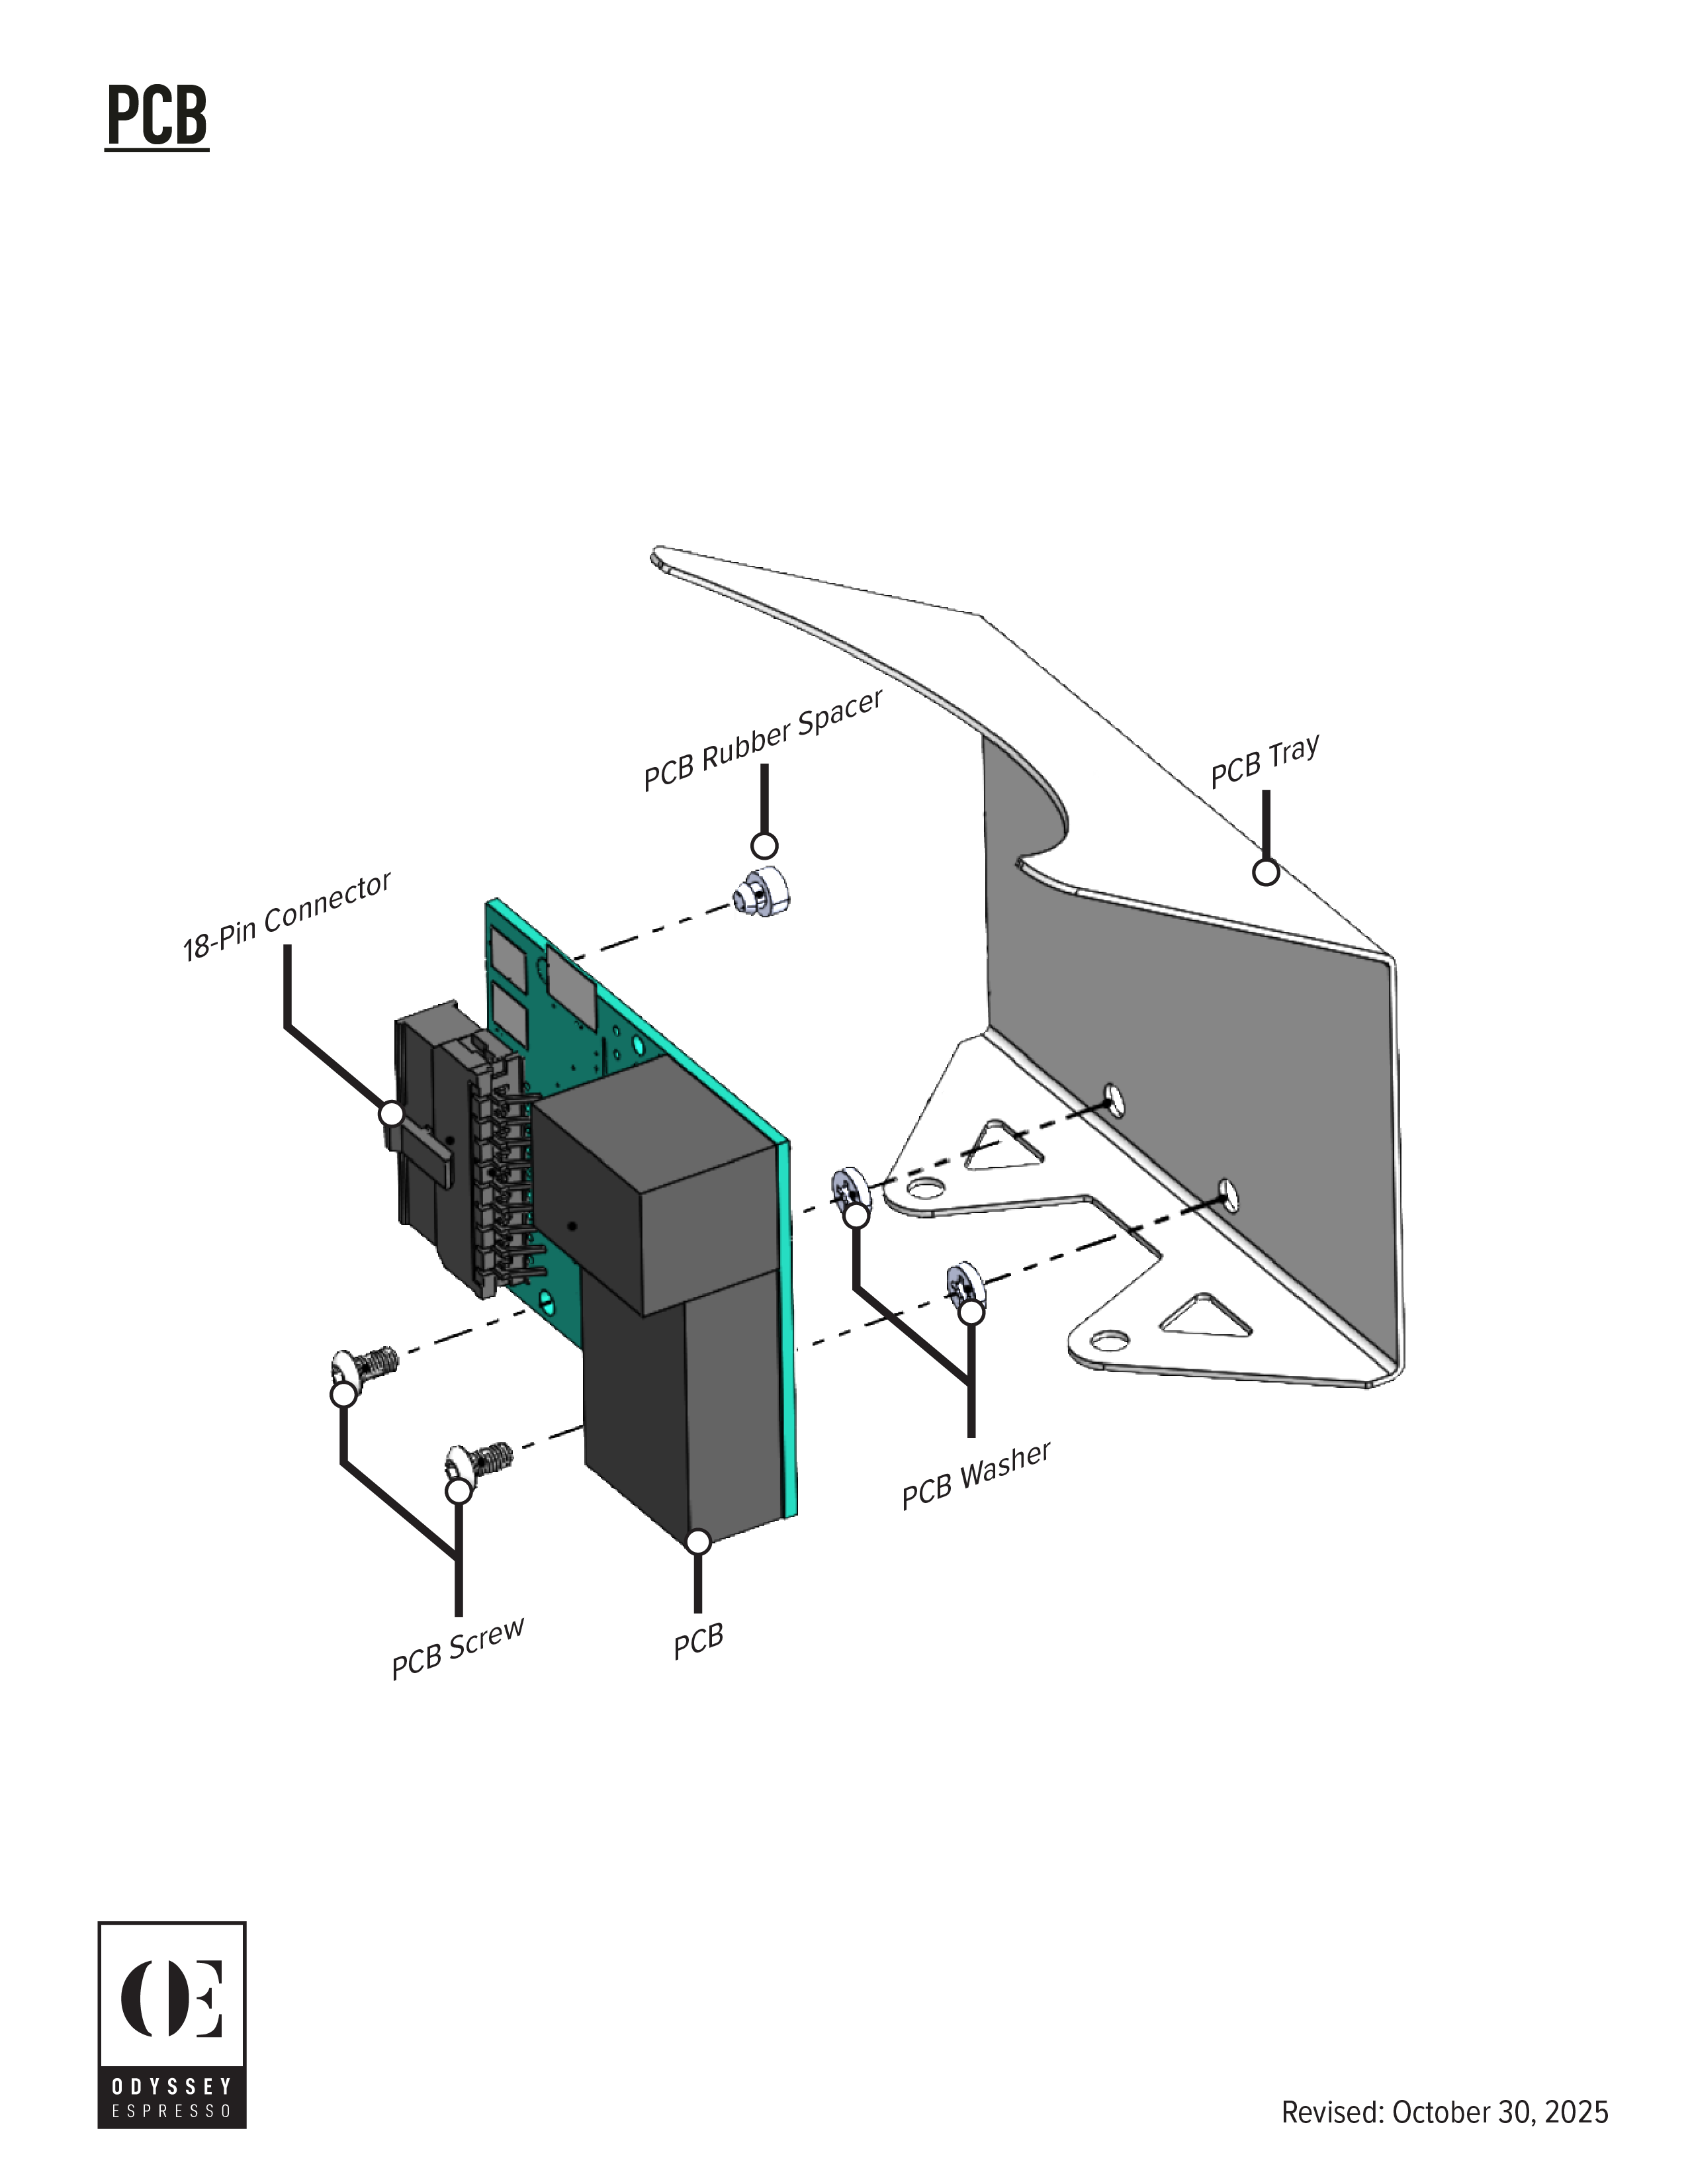

To disassemble
- disconnect the 18-pin connector from the PCB
- disconnect the PCB from the SSR, the back plate, and the heating element
- unscrew the PCB from the mounting plate
Note the positions and screws ring terminals from the #4 wire (yellow) on left, on the right, the Amber LED's black wire stacked with the #7 ground (green) wire. You'll need to remove these as well.
Reverse the steps when reassembling.
Disconnect the 18-pin Connector

- Locate the 3 mm screw securing two wires. Unscrew it.

- Unscrew the second screw on the opposite side (holding a single wire).
- Keep these screws safe.
Disconnect the PCB from the SSR, the back plate, and the heating element
- Disconnect the top wire from the rocker switch

- Disconnect the 90° angled wire at the power input

- Remove the large black wire connected to the SSR

- If wires are zip-tied, cut the tie to make room.
- Use a 7 mm wrench to loosen the nut on the heating element. Carefully catch the washers as they fall.

At this point, the PCB should be free to remove.
Reverse the steps when reassembling.
⚠️ Important Tips
- Don’t overtighten screws until all wires are in place.
- Catch or collect washers as they come off to prevent them rattling inside the machine.
- Keep wires close but not pinched when reassembling.