Installing / Swapping Spring Configurations
THIS ARTICLE IS A WORK IN PROGRESS
This article shows an alternative method for installing the spring into the lever for the Argos, using the machine as a helping hand in holding things together and maintaining alignment. The original method is shown by Ross in this video and is still a valid method.
The benefits to using this alternative technique are:
- Less mess since you're not touching the molykote on the piston o-rings.
- The spring cover screws act as a helping hand in getting the alignment right.
- It stays in place while just adjusting the front/back alignment
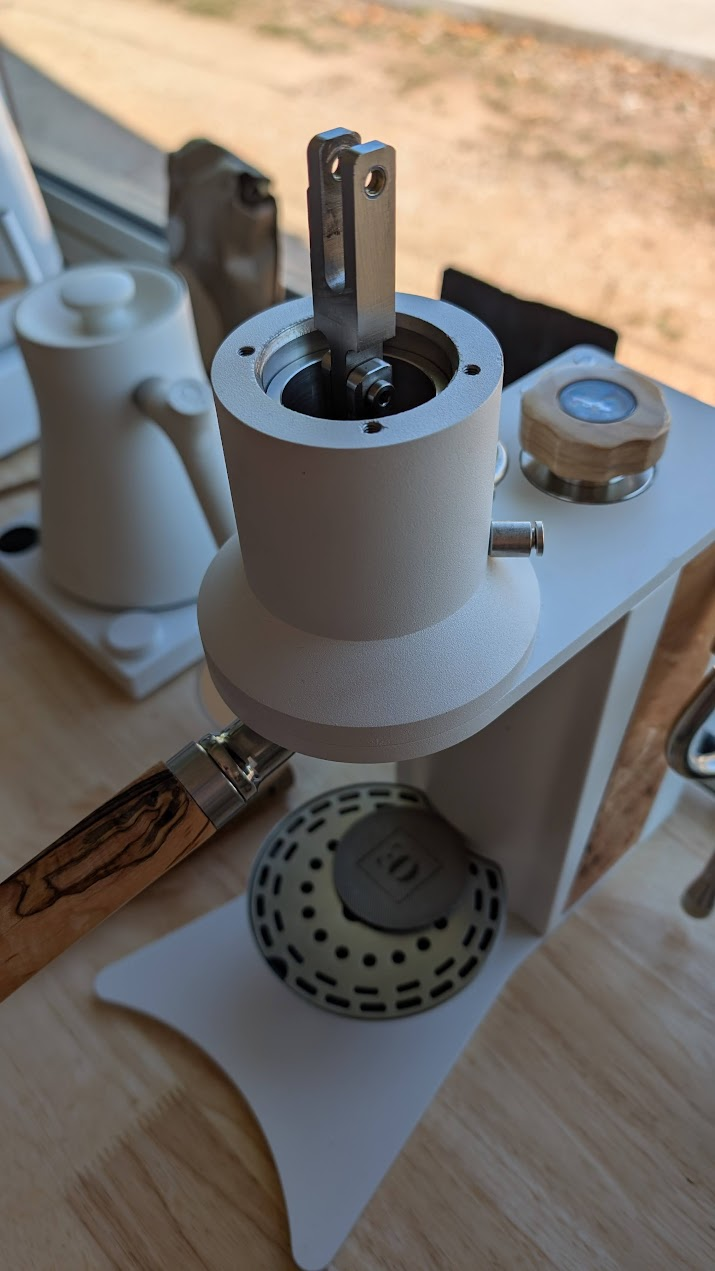
- Insert piston (making sure the bleed valve is oriented correctly towards the front and the linkage is in the correct hole)
- Slide spring cover plate and spring over lever, then attach lever to lever linkage using chicago bolts
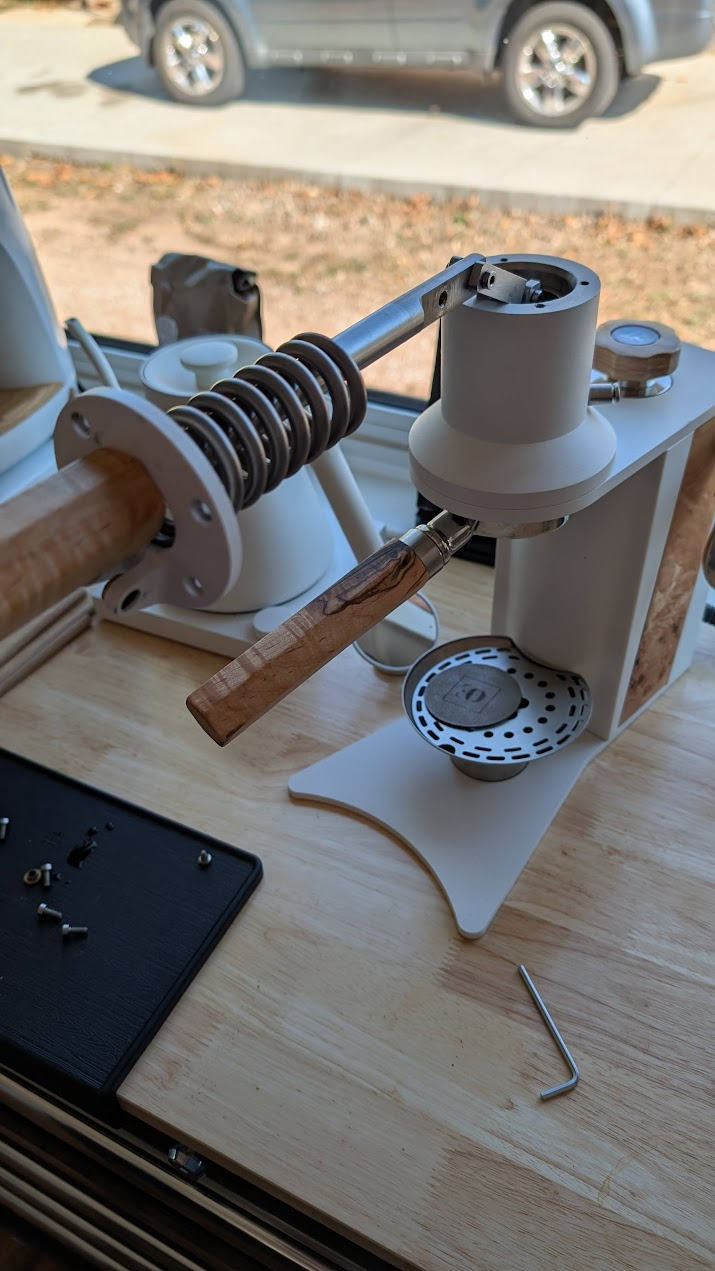
- Slide the spring into the grouphead and align the top plate oriented correctly, then screw in two screws to compress the spring and hold the top plate on
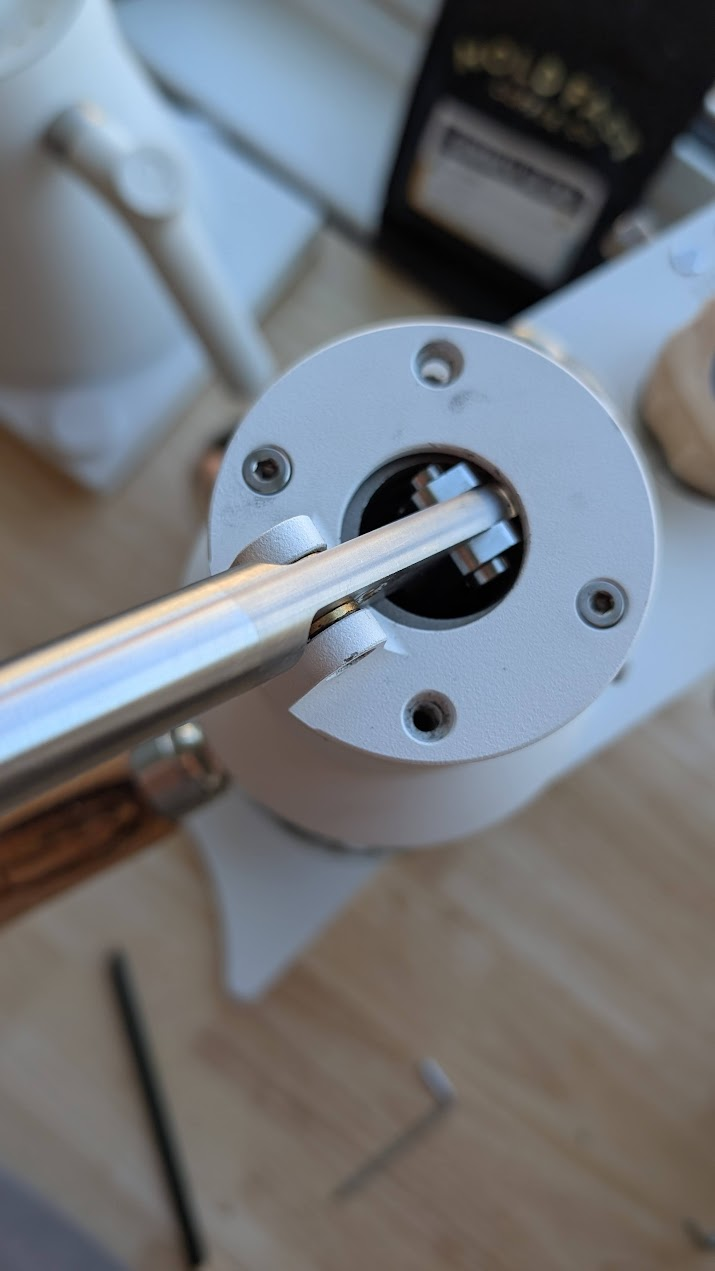
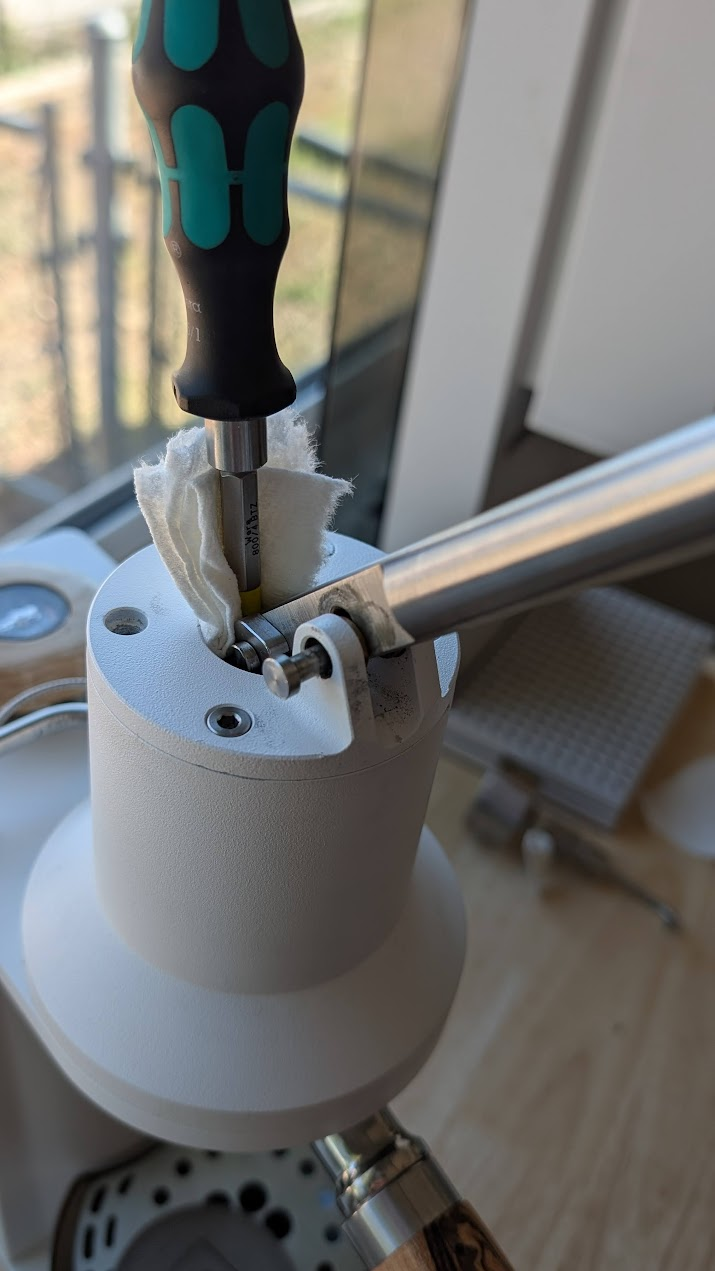
- (This is the slightly tricky part) Use something solid to push the back of the lever forward slightly to aid in alignment of the holes. I used a flathead screwdriver with a wadded up paper towel behind it to not mar the spring cover. Having the chicago bolt loaded in makes it easier to pop it into place once the holes are aligned. Once the chicago bolt is through, you can pull whatever you were using to apply pressure out of the grouphead (this will be snug in there now, hence why some padding is helpful). Then install the screw for that bolt, and remaining GH screws and you're good to go