Issues with Boiler Low Water Sensor
Low Water Sensor Always On
It's possible the metal probe of the fluid sensor slid down slightly and isn't conducting through the water like it should.
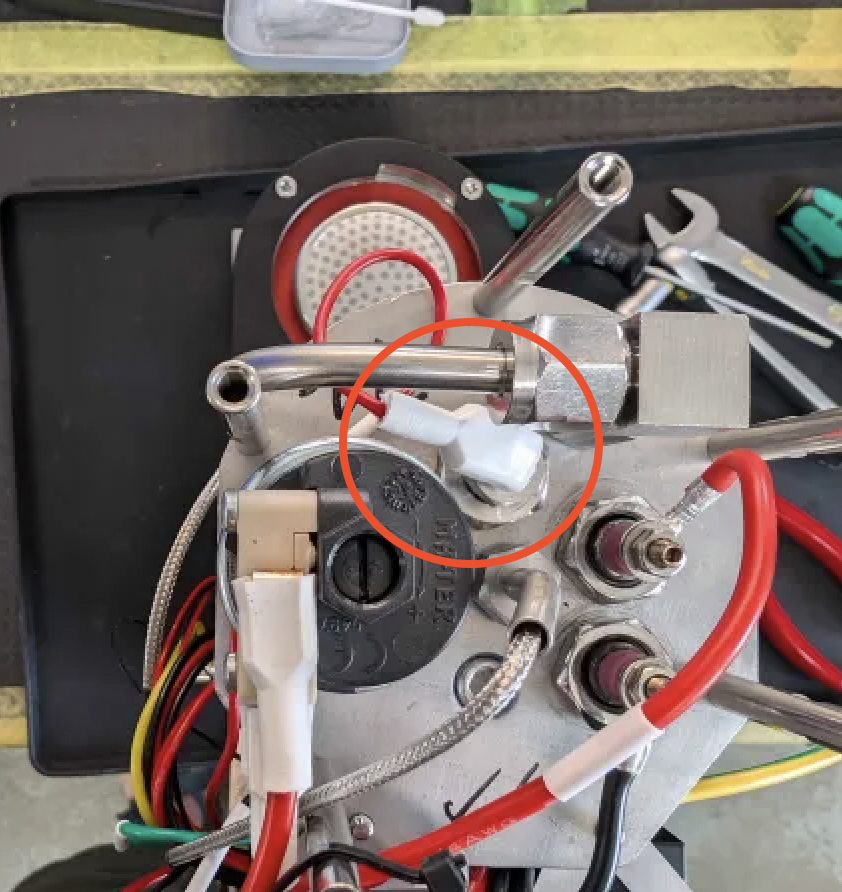
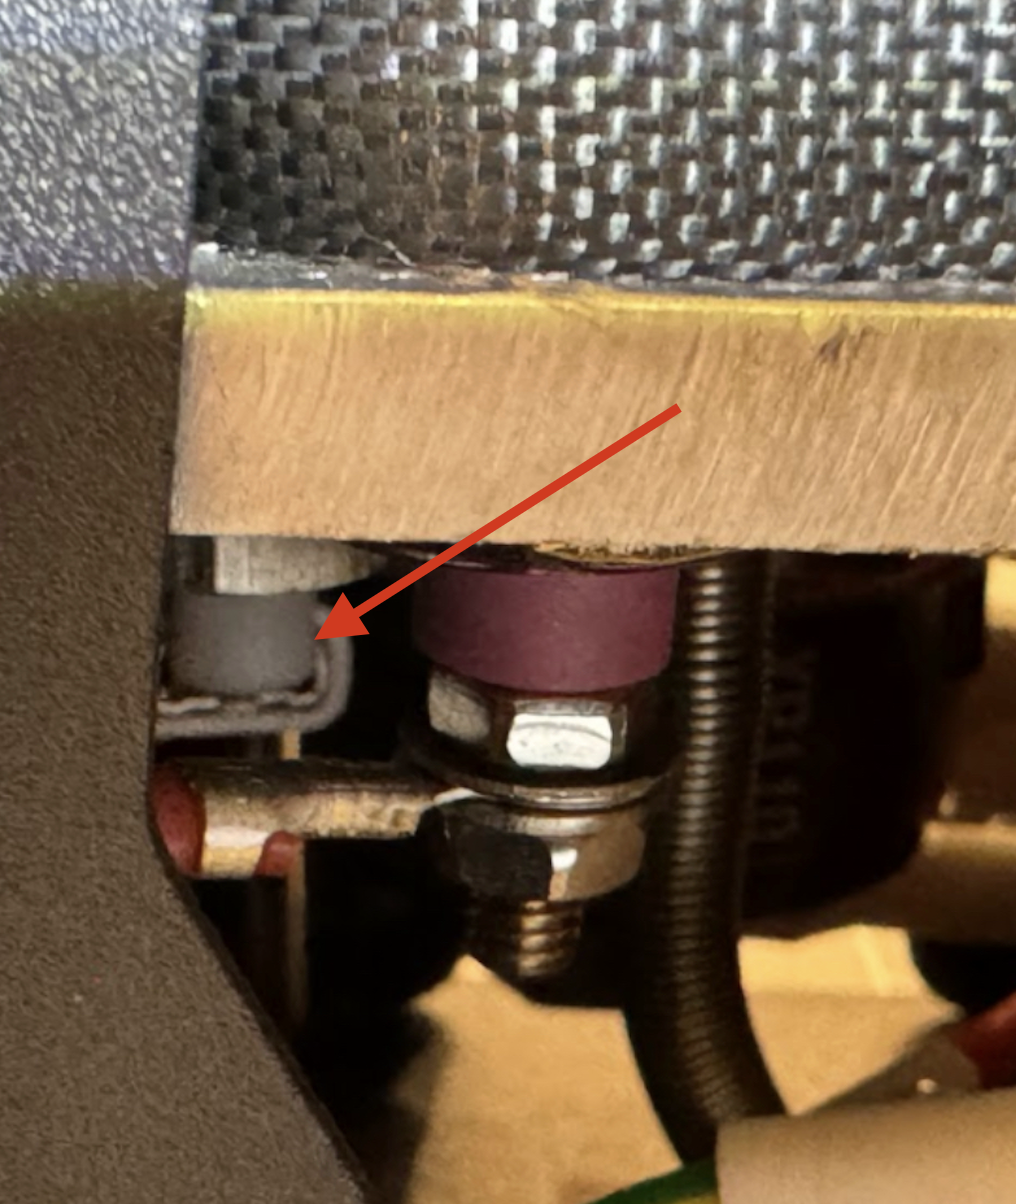
This is what the fluid probe should look like (on the bottom right)
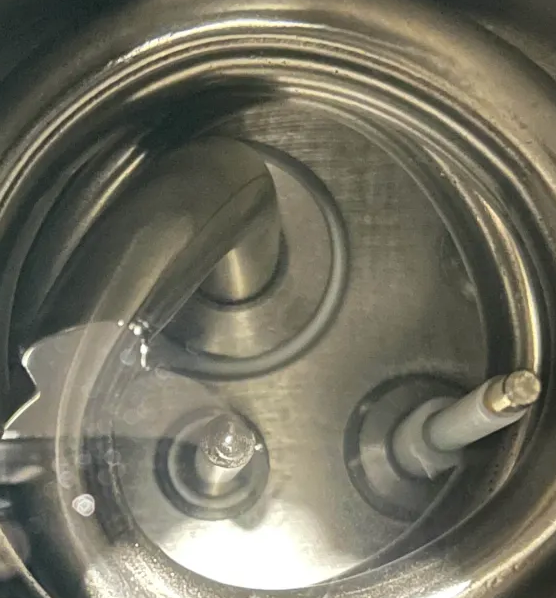
This is what it looks like if slid down

If it has slide down, there are 2 fix options.
The first one is loosening the sensor fitting and pushing it back up.
The second is ordering and installing a replacement part that has been updated with a crimped end and a thicker sleeve that will stop the probe from sliding down.
See below for the full instructions for each option.
If it hasn't slid down then its possible there is an issue with the wiring, scroll down to the section titled Wiring Connection
Fix Option 1: Pushing Up The Existing Sensor
- Remove the boiler cap and empty the boiler and flip the machine upside down.
- Remove the base plate, front and back panels
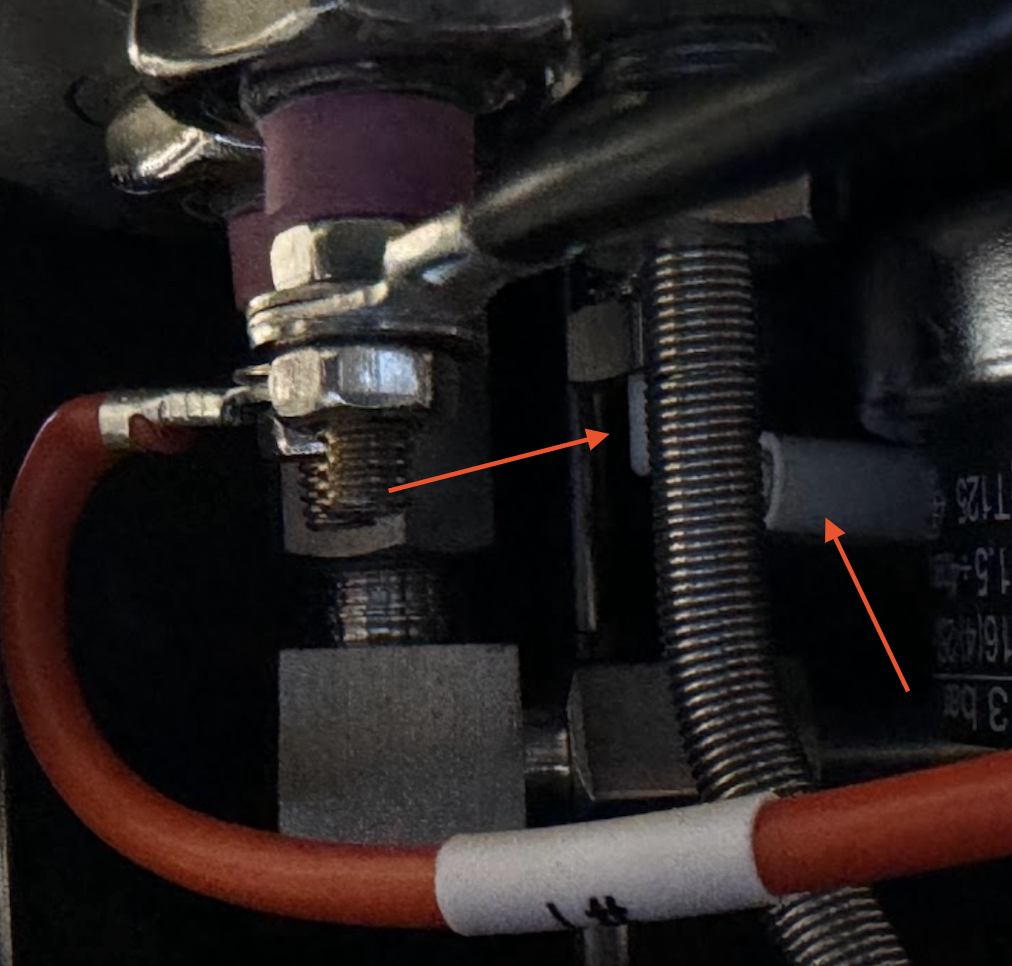
- With a 11mm box end wrench, loosen the 11mm bolt. It is the small bolt inside the larger bolt (you do not have to loosen or tighten this)


- Once the nut is loose, push the fluid probe back up
- Re- tighten the 11mm bolt
View from the side
For reference the inner PTFE tube that goes slides onto the probe is 2.5mm ID x 3.2mm OD x 70mm long.
This video will show you how to re-install the base plate
If the fluid probe looks normal, it is possible that the connection between it and the 18-connector is somehow faulty.
Remove the back and left side panel (facing the machine) and check the following:
-
Is the wire running from the fluid sensor kinked?
TRY: Straightening out wires
-
Is the wire's pin going into the 18 pin-connector snug?
TRY: Re-sit pin in 18-pin connector
-
Does gently wiggling the relevant wire make a difference?
TRY: Ensure pins in 18-pin connector are not failing to lock into place
- If pins are not locking in - follow this guide on how to adjust pin locking tabs
-
Are there signs of moisture that might be impacting the circuitry?
Please add Leak Troubleshooting to your to-do list to ensure moisture does not impact other parts of your machine
-
Does the fluid sensor work with the back panel removed?
TRY:
- Adjusting the wires coming out of the 18-pin connector to minimise pressure from back panel
- Adjusting the back panel, ensuring it is not bent too far inwards and exerting excess pressure on the wires exiting the connector
You only need to remove the left panel (looking from the front of the machine) and the back panel to access the relevant wires. If your steam wand is on the left, note that there may be some residual water in the system upon disassembly.
Option 2: Replacement Fluid Level Probe.
-
Order replacement probe
- Following the same steps above from Option 1.
- Remove the inner nut of the probe with the 11 mm wrench
- Remove the existing probe.
- Install new probe
- Tighten the inner nut with 11m wrench. It is a compression fitting so it needs to be fairly snug
Wiring Connection
If the fluid probe looks normal, it is possible that the connection between it and the 18-connector is somehow faulty.
Remove the back and left side panel (facing the machine) and check the following:
-
Is the wire running from the fluid sensor kinked?
TRY: Straightening out wires
-
Is the wire's pin going into the 18 pin-connector snug?
TRY: Re-sit pin in 18-pin connector
-
Does gently wiggling the relevant wire make a difference?
TRY: Ensure pins in 18-pin connector are not failing to lock into place
- If pins are not locking in - follow this guide on how to adjust pin locking tabs
-
Are there signs of moisture that might be impacting the circuitry?
Please add Leak Troubleshooting to your to-do list to ensure moisture does not impact other parts of your machine
-
Does the fluid sensor work with the back panel removed?
TRY:
- Adjusting the wires coming out of the 18-pin connector to minimise pressure from back panel
- Adjusting the back panel, ensuring it is not bent too far inwards and exerting excess pressure on the wires exiting the connector
Low Water Sensor Not Detecting When Boiler is Empty
First make sure you have descaled your machine with the instructions here https://help.odysseyespresso.com/article/22-citric-acid-passivation-and-descale and then check to see if the low water sensor works. Otherwise continue below.
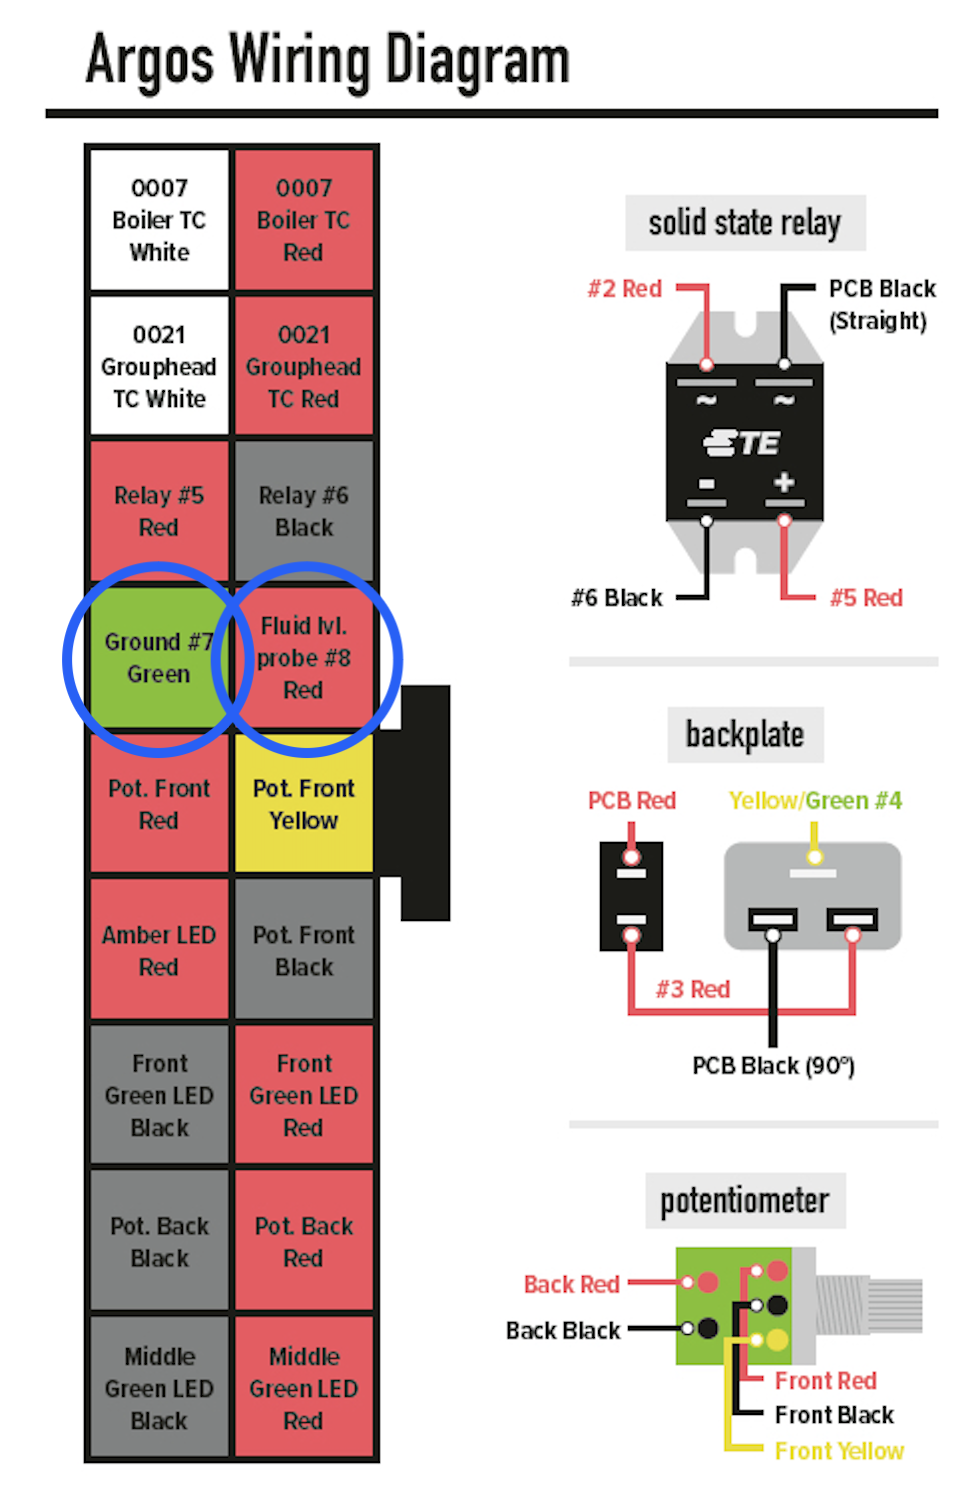
The fluid sensor reports a low boiler when no conductance is found from the tip of the low fluid level sensor to the boiler wall, so this issue is most likely caused by a grounding issue with the sensor wires.
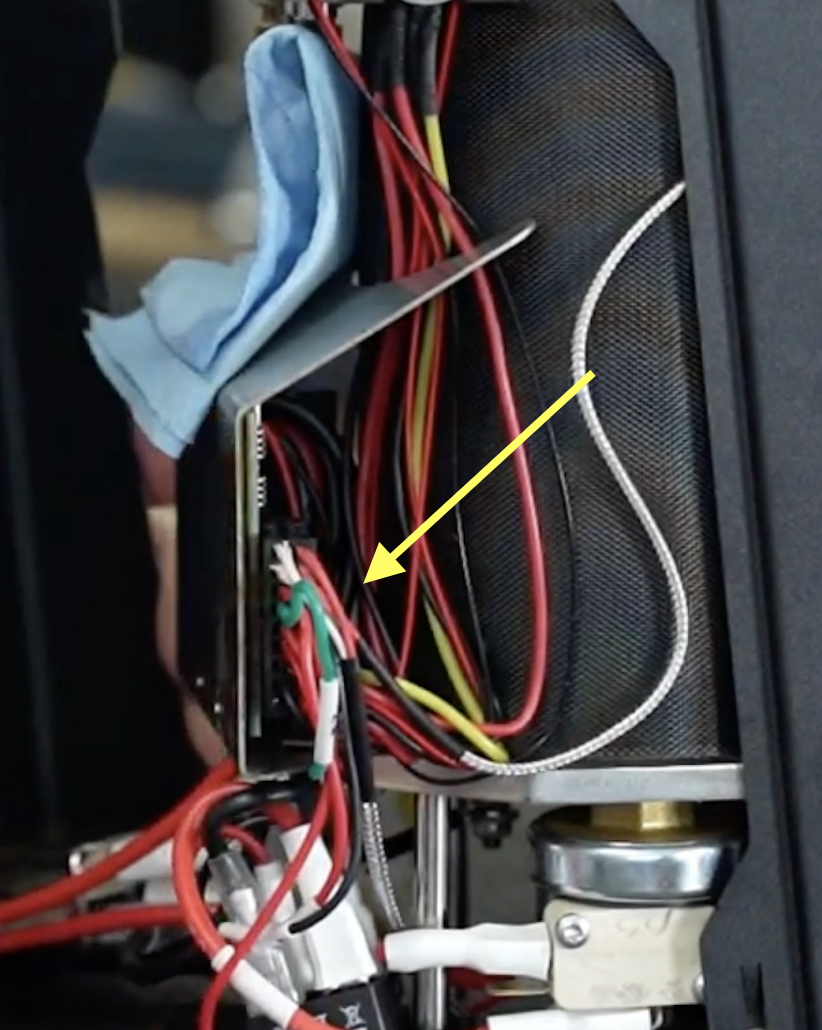
We need to remove the left side panel to access the 18-pin connector here
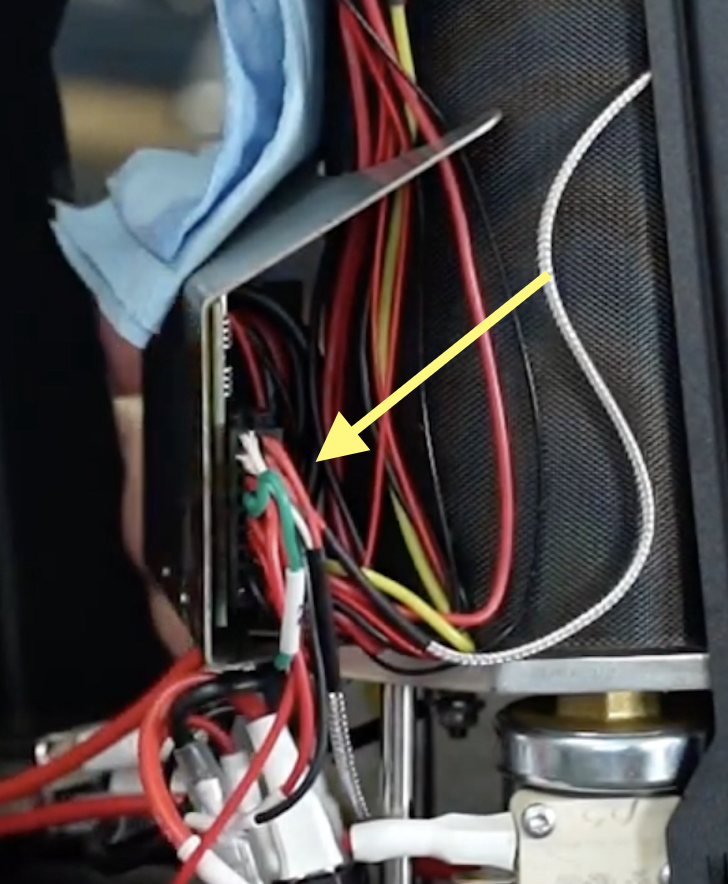
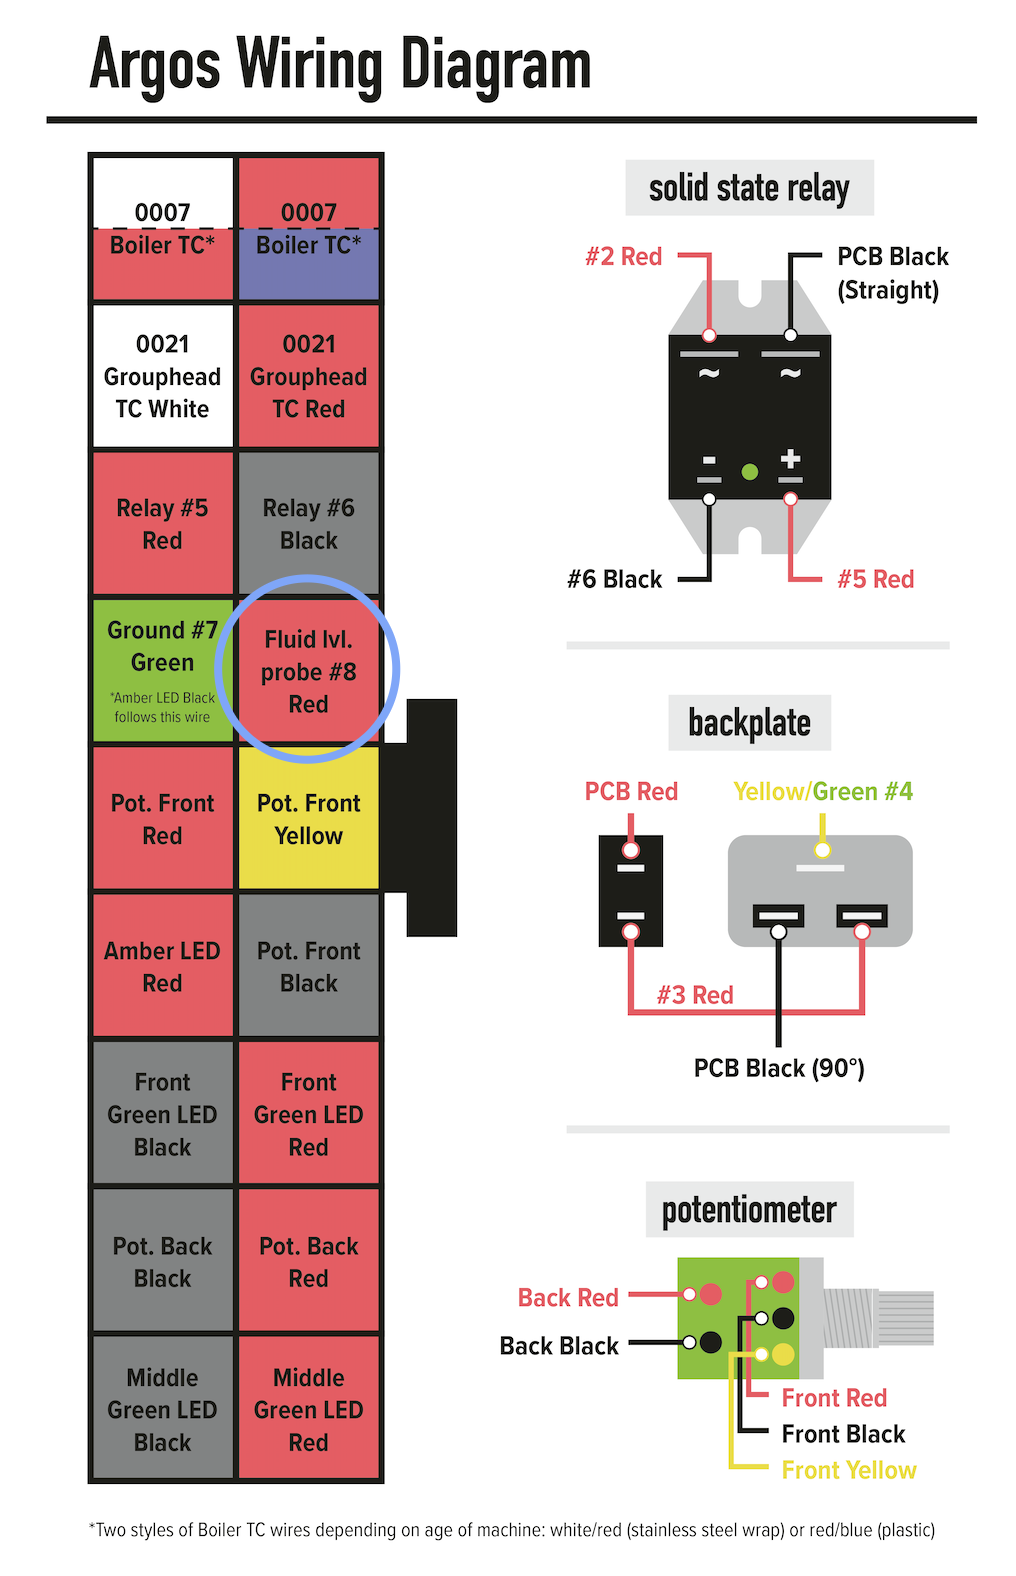
We'll want to check that the green wire #7 going into the 18-pin connector is secure/has a good connection, and the long red wire #8 going to the probe is also good. Make sure both are secure in the 18-pin connector and, if you give a gentle tug the wire, it doesn't come out of the connector.